Hosting a Website on AWS S3
Hosting a website in a simple and straightforward way.
Here I'll show a simplified tutorial on how to host a static website on AWS S3.

Deploying the front-end to S3
First, it's worth noting that the example stack I'm using is from my Sharkar project: Angular 17, Node v18.20.8, Java 17 with Spring Boot 3.3.8, and SQL Server as the database.
With that in mind, we'll start by building the Angular project so we can put it inside the AWS S3 Bucket.
If you're using this as a guide, just keep in mind that for projects using a different framework, there might be some specific differences. Either way, the general idea practiced here will be the same.
Building the Project
I generated the build with a simple ng build inside the project. This will generate the dist folder, which is where the project's generated static files will live.
ng build

With the files inside the folder, we can now head over to S3.
Creating the Bucket
-
To use any AWS service you need an account, so that would be the first step: https://aws.amazon.com/
-
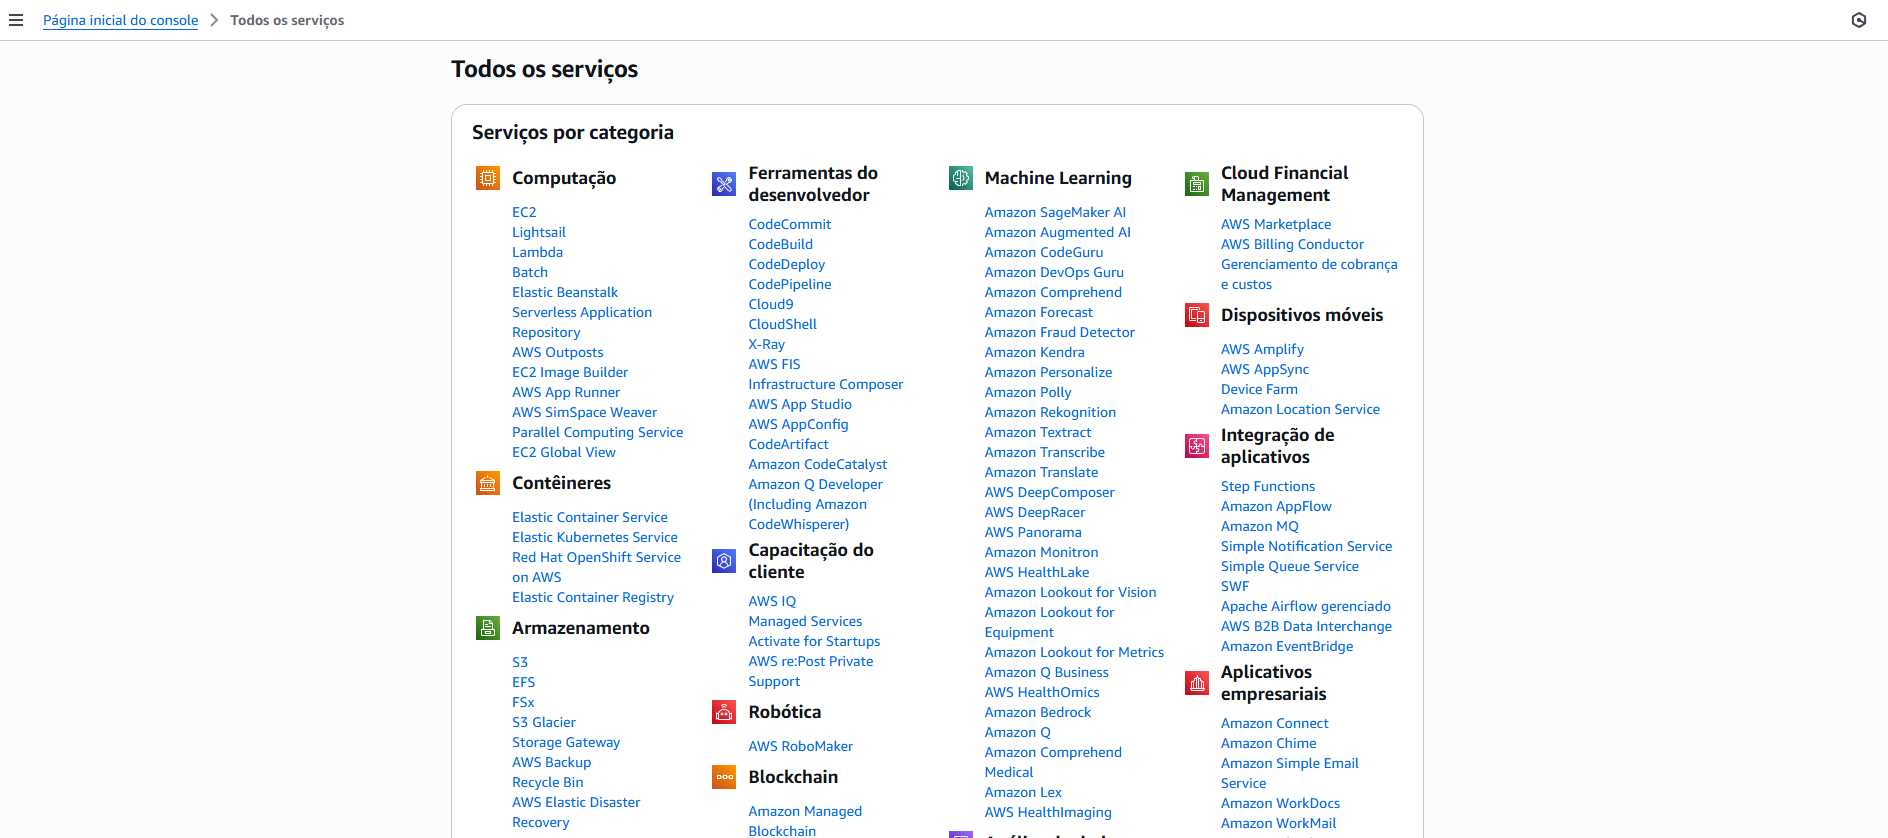
After that, we'll head to the S3 section, accessing the general page for all services and finding it there under the Storage section.
- When you access the page, you'll see the buckets you have. If you've never used it, it'll be empty. In my case, Sharkar is already active.
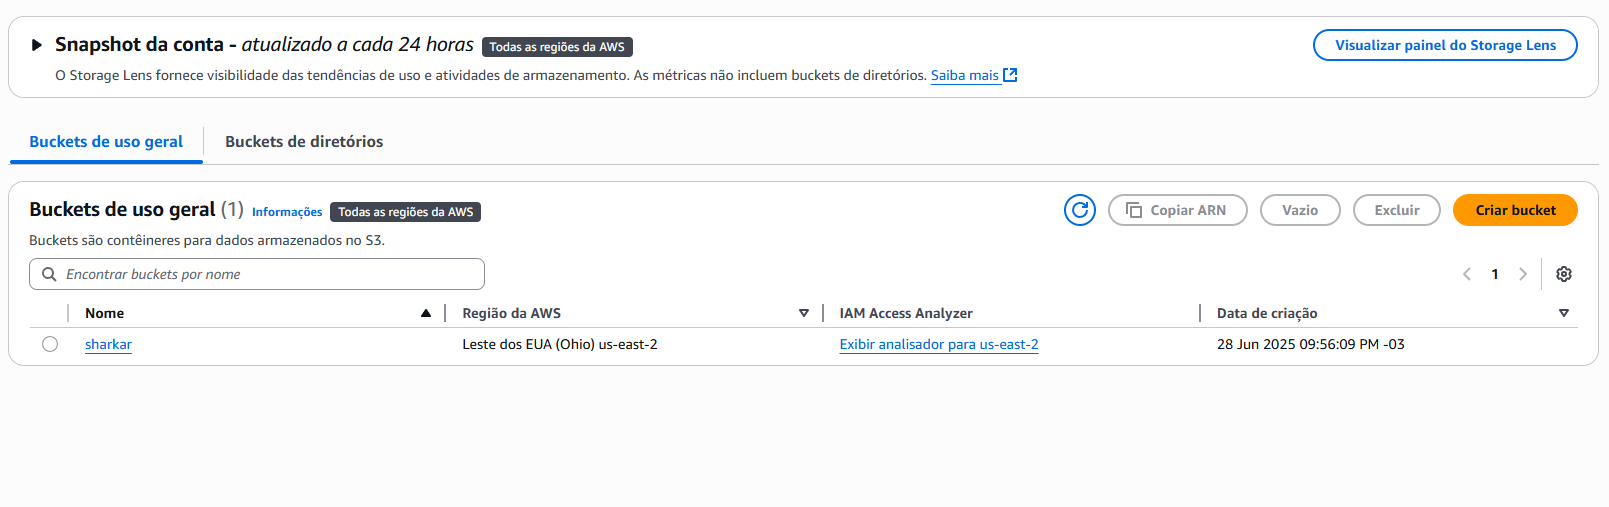
- Let's create a new bucket by clicking the highlighted button.
On the new page, there are two sections we need to change for now: bucket name and permissions.
When it comes to the bucket name, it's important to be aware that this name will be part of your website's URL, at least until you set up (purchase) a custom domain.
Example:
Depending on the region, S3 can use two URL formats:
- s3-website-Region ‐
http://yourbucketname.s3-website-Region.amazonaws.com - s3-website.Region ‐
http://yourbucketname.s3-website.Region.amazonaws.com
Sharkar's, for example, before setting up the custom domain, looks like this:
http://sharkar.s3-website.us-east-2.amazonaws.com/
- Now with the name set, let's adjust the permissions.
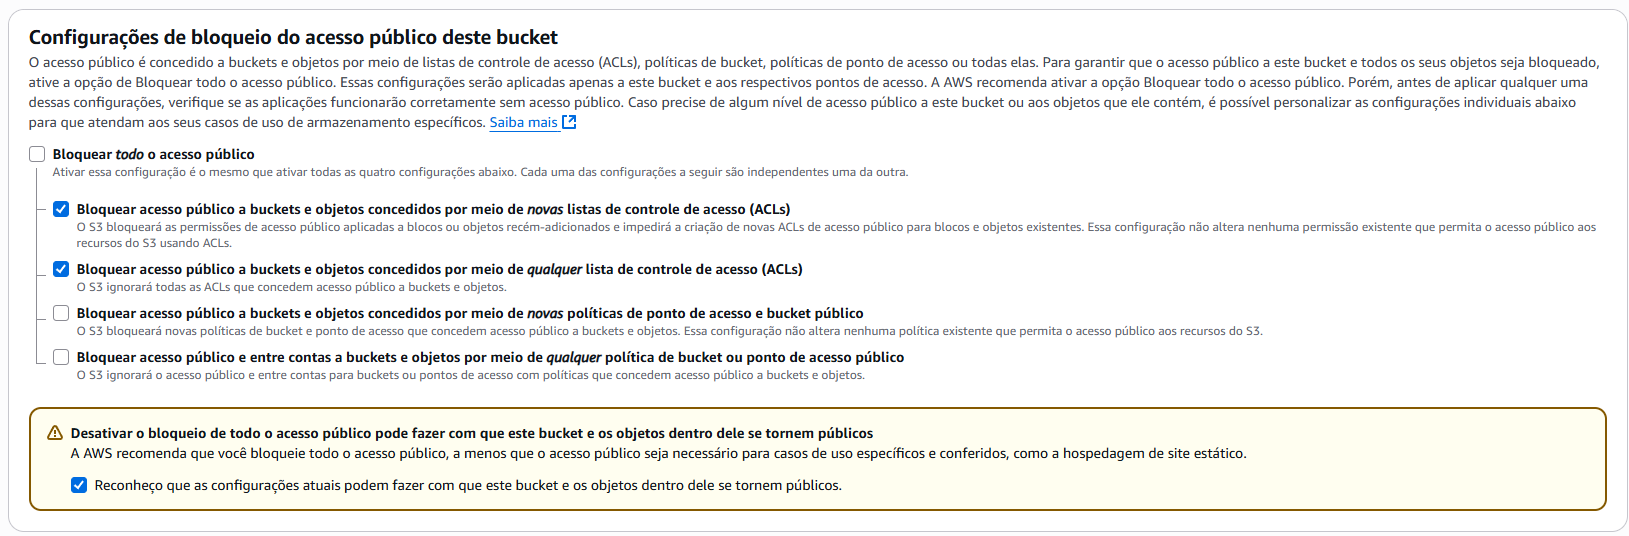
We'll go to the access section and leave the configuration like this.
Why like this, you might be wondering?
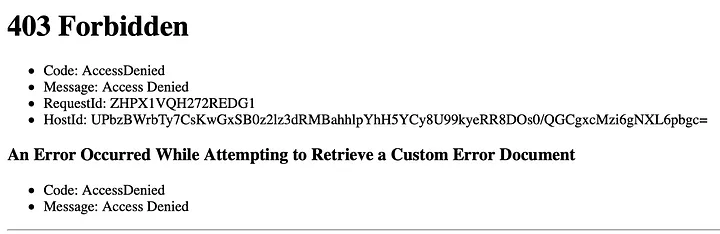
Basically, it's to tell S3 that we want to give the bucket public read access, but not write access — view only. After all, if we leave it blocked, the site won't be visible and we could get an error like this:
- Once configured accordingly, click Create and then click the bucket's name to access it.
When you click the bucket's name you'll see it's empty in the "Objects" section, so now is when we'll upload the files we generated during the project's build phase.
There's not much mystery here — you'll click "Upload" and add the files generated in the /dist/project-name/browser/ folder (usually containing index.html, style.css, etc).
- After adding the files, let's configure S3 as a static website host.
Go to Properties => Static website hosting => Edit
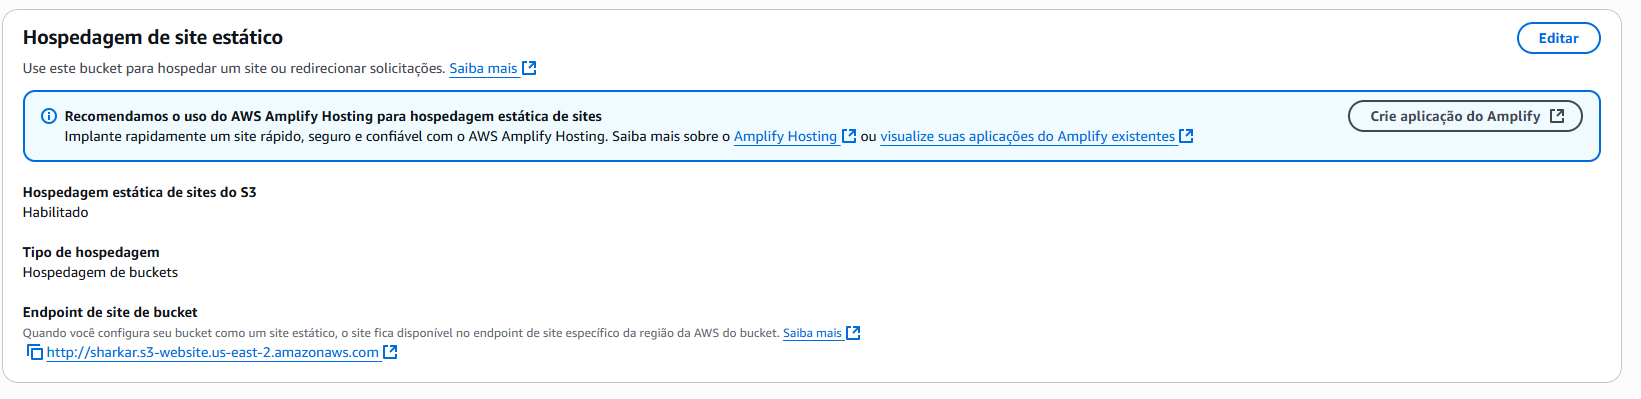
Yours will look different from this, but just click Enable on the new page and set the configuration like this:
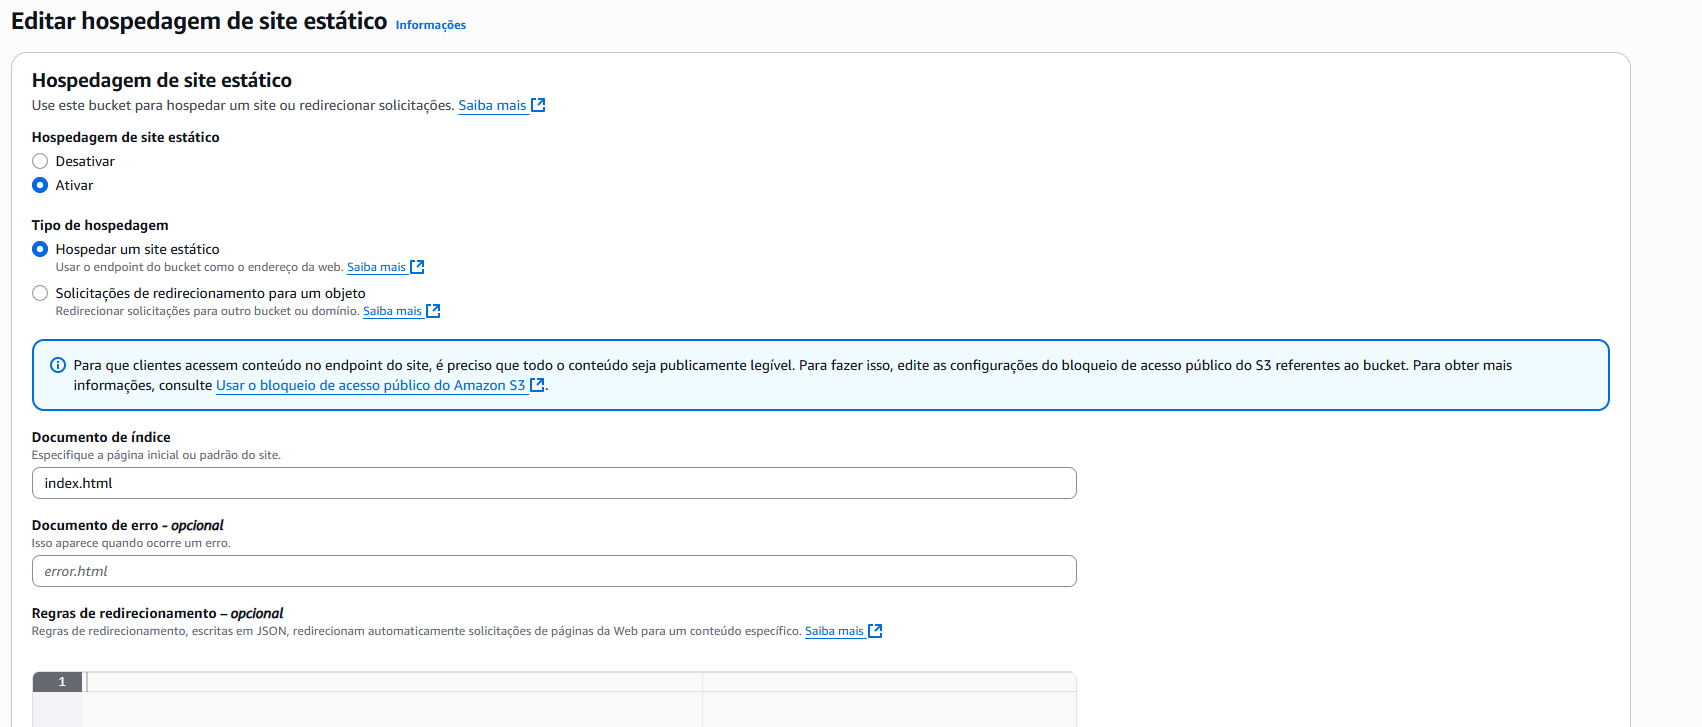
Nothing too mysterious.
- After setting it up as hosting, now we just need to create a policy in the permissions tab, so go to
Permissions => Bucket Policy => Edit.
There you'll update the JSON to set an access policy. Just follow this template and only change the bucket name to yours:
{
  "Version": "2012-10-17",
  "Statement": [
    {
      "Sid": "AllowPublicAccess",
      "Action": [
        "s3:GetObject"
      ],
      "Effect": "Allow",
      "Resource": "arn:aws:s3:::your-bucket-name/*",
      "Principal": "*"
    }
  ]
}
- After that, do two pirouettes and three backflips.
- Kidding. After that, just access your site and it'll be up and running.